11 Best Ways To Take Screenshot on Asus Laptop Windows 10 PC Laptop – Are you facing any issues while taking a screenshot on the Asus laptop? Then you are in the right place. in this post, I will share with you, how to take screenshots on an Asus laptop.

Table of Contents
How To Take Screenshot on Asus Laptop Windows 10 PC Laptop
Yes, you are right, In this post, you will learn how to take screenshots on an Asus laptop with the operating system Windows 10 with various methods, like with the help of external software or by default screenshot methods available on various Operating Systems, So read the article fully and learn how to take screenshots on Asus Laptop.
Read more:
- Best Tricks To Activate Windows 10 Permanently Offline
- How to Remove and Clean Virus on Windows 10 Laptop
- How to Activate Windows Defender on Windows 10
- Best Tricks To Activate Windows 8 Permanently Offline
Following the steps below I have discussed how to take a screenshot on the Asus laptop.
Taking screenshots on the Asus laptop is quite the same as other brand laptops, but there are slight differences depending on the brand of laptop that we use and also some differences in the various operating system.
The latest Windows 10 provides to create screenshots with onboard tools. Although there are various additional tools available in the market, some of them are available free of cost, and some the premium tools.
In the latest generation, ASUS Laptops that are running on Microsoft’s Windows 10 Operating System are easy to take screenshots, where you have to download and install certain Software or add-ons for taking screenshots on your ASUS Laptop.
The latest generation of ASUS Laptops has quite a simple technique for taking screenshots.
How To Take Screenshot on Asus Laptop Windows 10
Some Latest ASUS Laptop Model series are listed below:
- Asus ZenBook Series
- VivoBook Series
- StudioBook Series
- Chromebook Series
- Commercial Series
- Gaming Series
- FX / ZX Series
- TUF Gaming Series
#1. The Screenshot on Asus Laptop with Snipping Tool
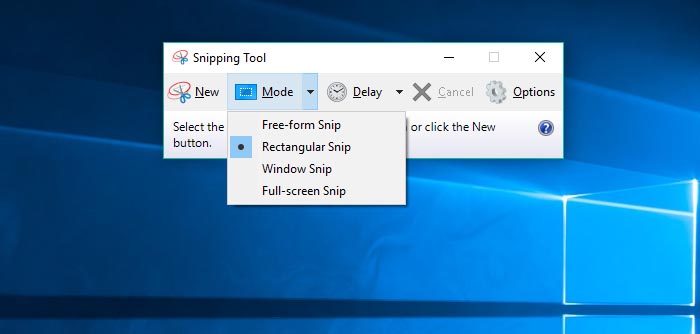
A built-in Windows screenshot tool, Snipping Tool is present since Windows Vista. You can find this tool in Start> All Programs> Windows Accessories> Snipping Tool.
To use the Snipping tool, open it and click New to start the screenshot process. The default snap type is a rectangular snip – you’ll use your mouse to cut off the rectangular portion of your screen to take. You can also take pictures of forms, windows, and full screen with the Snipping Tool.
The snipping tool does not automatically save your screenshots, you need to save them manually in the tool before you exit. It automatically copies your screenshot to the clipboard.
#2. Print Screen on Asus Laptop

To capture your entire screen, tap the PrtScn keyboard button. Your screenshots will not be saved but will be copied to the clipboard, you have to open an image editing tool (such as Microsoft Paint), insert a screenshot in the editor, and save the file from there.
#3. The Screenshot on Asus Laptop Windows Key + Print
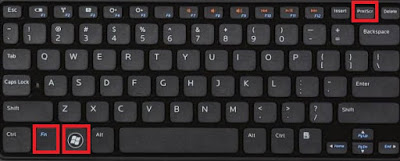
To capture your entire screen and automatically save a screenshot, press the Windows Key + PrtScn key. Your screen will briefly dim to indicate that you’ve just taken a screenshot, and screenshots will be automatically saved in the Pictures> Screenshots folder.
#4. The Screenshot on Asus Laptop with Windows + H Button

If you want to capture the whole screen for sharing purposes, you can use Windows Key + H keyboard shortcuts.
This will capture your entire Asus laptop screen and open the Windows Share toolbar so you can instantly share it with your friends via email, Facebook, Twitter, One Note, etc.
#5. Alt + Print Screen
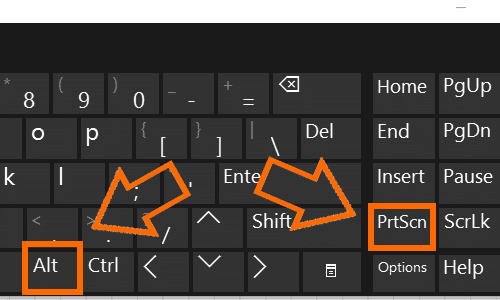
To take a screenshot of the Asus laptop quickly from the active window, use the keyboard shortcut Alt + PrtScn. This will take your current Windows snapshot and copy the screenshot to the clipboard. You need to open a shot in the image editor to save it.
#6. The Screenshot on Asus Laptop with Windows Logo Key + Volume Down
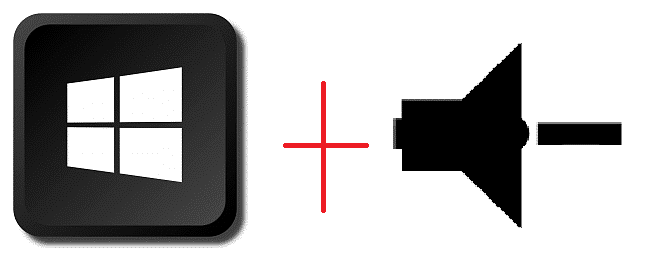
If you shake the Windows Surface device, you can use physical buttons (well, sort of physical) to take screenshots of your entire screen – similar to how you would capture screenshots on a smartphone or Other tablets.
To do this, hold down the Windows Logo touch button at the bottom of your Surface screen and press the physical volume-down button on the side of the tablet.
The screen will be dimmed briefly and the screenshots will be saved automatically to the Pictures> Screenshots folder.
#7. The Screenshot on an Asus laptop with Snip Editor
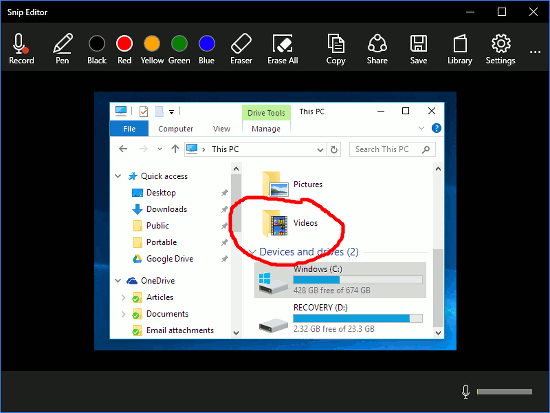
Snip Editor, or Microsoft Snip, Is a Microsoft Garage project that works a bit better than the Cut tool (I think).
Snip Editor allows you to quickly take screenshots of the entire screen, active window, or rectangle cropped manually – and you can set the PrtScn key as a shortcut to the Snip Editor screenshot tool.
The app also features various ways to annotate screenshots, including free pen options (suitable for Windows Ink fans) and sound recordings.
Like the Snipping Tool, Snip Editor lets you snooze screenshots for up to 5 seconds, so you can snapshot of the lost menu and tooltips.
Snip Editor allows you to quickly take screenshots of the entire screen, active window, or rectangle cropped manually – and you can set the PrtScn key as a shortcut to the Snip Editor screenshot tool.
Including free pen options (suitable for Windows Ink fans) and sound recordings. Like the Snipping Tool, Snip Editor lets you snooze screenshots for up to 5 seconds, so you can snapshots of lost menus and tooltips.
#8. Lightshot
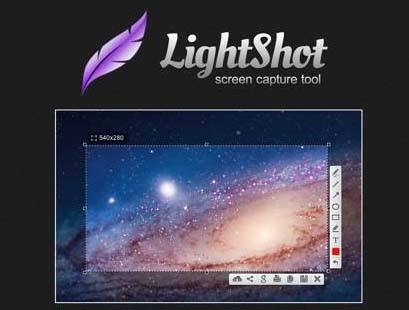
This application offers a screenshot method that can be done easily, but before making sure you have installed this application and the Lighshot icon will appear in the Windows taskbar.
For the next step, you need to select the screen display or image you want to screenshot, then click the Lightshot icon on the Taskbar menu. Then you select the area to be captured and use your laptop mouse.
After you select the image and save it by clicking on the diskette icon or logo, save it according to the format provided namely PNG, JPEG, and BMP.
For additional features there are share, print, copy, add text, give a marker, and others. In terms of small size, it is only 4MB and supports Windows XP, Windows 7, Windows 8, and Macintosh.
#9. Jing
Jing Applications that have the features and tools offered are not much different from other screenshot applications.
Plus it can record the screen display in 5 minutes duration. It’s easy, just select the Capture Video menu in the Menu option. However, for saved image formats PNG is only available.
#10. Schirmfoto
The advantages of the application are that can store screenshots in high resolution, and the choice of format also varies such as JPG, PNG, and PDF.
The good, the screenshot application on this laptop can record video displays on the screen. Other features you can edit by cropping, printing, and adding watermarks, markers, and more.
The matter of its very small size, which is only about 5MB, and supports Windows XP, Windows 7, Windows 8, and Windows 10.
To use this application, you can simply click the camera icon and the image will be saved automatically. Schirmfoto can also allow you to capture the desired image.
So, friends, these above are some ways how to screenshot on an Asus laptop windows 10, I hope this guide will help you to take a screenshot on the Asus Laptop. If you have any queries related to this article you can comment below we will definitely get back to you.

Leave a Reply