How To Turn Off Auto Updates Windows 10 PC – Are you a Windows 10 user? If so, maybe you are the one who feels disturbed by the auto-update feature in Windows 10 that runs automatically. But you don’t need to worry, you can overcome it by permanently turning off Windows 10 updates.

Table of Contents
How To Turn Off Auto Updates Windows 10 Laptop PC 2024
On Windows 10, the update will run and install automatically when an update is available. Although updates from Windows have additional features in terms of security, performance, and stability improvements, the auto-update feature makes many Windows users feel annoyed.
Read more:
- Best Tricks To Activate Windows 10 Permanently Offline
- 4 Ways to find your Computer’s System Specification
- Best 3 Ways To Update Windows 10 Offline
- Best 4 Ways to Activate MS Office 2016 Permanently
The Windows update feature in Windows 10 is very different from the version in Windows before. How to disable it is more complicated than Windows 8, 7, and XP.
Although Windows 10 provides more features that make it easy to move, the auto-update feature on Windows 10 will bother you.
#1. With CMD
The first method so that Windows 10 does not update automatically by the command prompt or better known as CMD. You can disable automatic updates from Windows 10 through commands in CMD.
How to turn off Windows 10 updates with cmd:
- Run CMD using administrator access.
- Type the command in CMD takeown / f “% windir% \ System32 \ UsoClient.exe” / a
- Then press the enter button.
- Then enter the command to CMD icacls “% windir% \ System32 \ UsoClient.exe” / inheritance: r / remove “Administrators” “Authenticated Users” “Users” “System”
- And then press the enter key on the keyboard.
Now the Windows 10 auto-update feature will be turned off so that if there is a recent update from Windows, then the computer will not update.
2#. MSC GEDIT
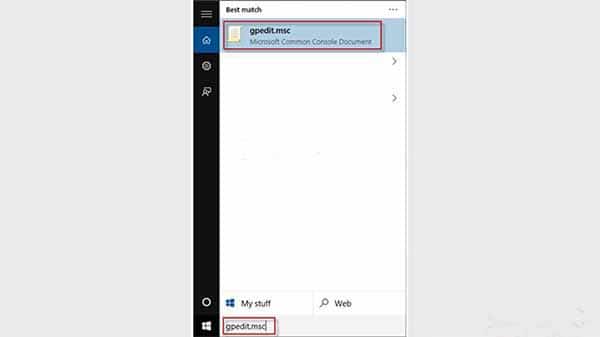
In Enterprise, Education, and Professional versions of Windows 10, you can use the Local Group Policy Editor or gpedit.msc to be able to permanently disable windows automatic updates.
How to turn off auto-updates on Windows 10 via gpedit.msc:
- Click Start and type gpedit.msc then enter.
- Access the Computer Configuration> Administrative Templates> Windows Components> Windows Update folder
- Double-click the Configure Automatic Updates option on the right side.
- Select the Disabled option to turn off the auto-update feature.
- Click the Apply button.
- Finally, click the OK button.
After you have done the steps above, Windows 10 will stop updating automatically. However, you can reactivate it through the same changes as the guide above.
3#. Provides Connection Limits
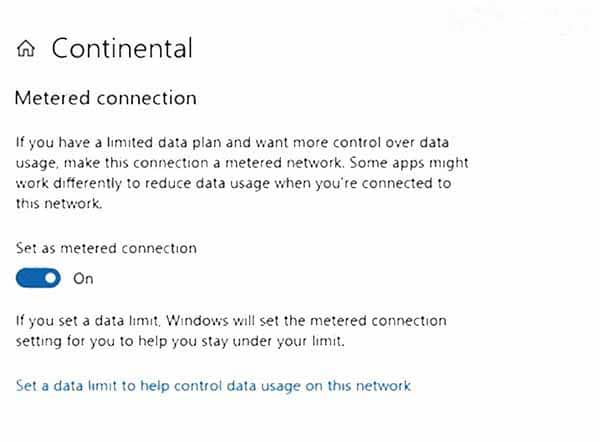
You can turn off auto-updates on Windows 10 by providing WiFi network restrictions. Because of the size of updates from windows which are generally quite large, this method is very effective for disabling automatic updates from Windows 10.
How to permanently disable Windows 10 updates:
- Make sure the laptop is connected to a Wi-Fi network.
- Open the Settings menu or Windows 10 Settings.
- Then enter the Network & Internet menu.
- Choose the name of the wifi network that is connected to your laptop.
- Click on the Metered Connection options section.
- The final step is to set Set as Metered Connection to ON.
This method is very effective if you are a wifi network user on a computer or laptop. By enabling connection restrictions, every time a Windows 10 update is available, the laptop or computer will not update automatically.
Read more: Fix Windows 10 License Will Expire Soon
4#. Via Regedit

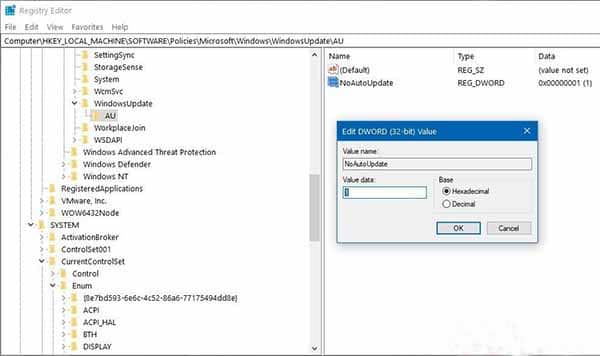
The last method to stop automatic updates from Windows 10 is to make a few changes in the registry or better known as Regedit.
Here’s how to turn off Windows 10 updates via Regedit:
- Click the Start menu, type Regedit then enter.
- Access the Regedit menu HKEY_LOCAL_MACHINE > SOFTWARE > Policies > Microsoft > Windows.
- Right-click the Windows folder and select New> Key.
- Enter the WindowsUpdate key name then press Enter.
- Then right-click the key, and select New> Key.
- Name the key with AU then press Enter.
- Enter the AU key, right-click on the right window, and select New> DWORD (32-bit) Value.
- Give the name NoAutoUpdate then press Enter.
- Double-click NoAutoUpdate and change the value from 0 to 1.
- Click OK then Restart your laptop or pc.
Read more:
- Activate Windows 8 Permanently Offline
- Activate Windows 7 Permanently Offline
- “This copy of Windows is not Genuine”
Conclusion:
So, friends, these on the above how To Turn off auto-updates Windows 10: Best In 2024, After you have followed the steps above, automatic updates in Windows 10 have been confirmed to be successfully deactivated.


![29 Ways to Activate and Use Cortana in Windows 10 [2025] How to Activate and Use Cortana in Windows 10](https://technadvice.com/wp-content/uploads/2022/02/How-to-Activate-and-Use-Cortana-in-Windows-10-218x150.jpg)


![6 Easy Ways to Fix Word Not Responding on Windows 10 [2025] 6 Easy Ways to Fix Word Not Responding on Windows 10](https://technadvice.com/wp-content/uploads/2023/03/6-Easy-Ways-to-Fix-Word-Not-Responding-on-Windows-10-100x70.png)


