How to Add a Ringtone to iPhone without iTunes – Standard tones and pings aren’t exciting you anymore? Unfortunately, your iPhone does not offer you a direct option to set your own music as a ringtone.

Table of Contents
3 Steps to Add a Ringtone to iPhone without iTunes
However, you can select your favorite song as a call hint via a few small detours. This article shows you several ways how this works.
Read more:
- How To TweakBox Download for iOS iPhone-iPad
- How to Install and Use Apple Notes on Windows 10 PC
- How To AppValley App | Get Apps Without Jailbreak
Do you manage music on your iPhone via the Apple library? Then you know: nothing works without iTunes. You can use the software to create playlists and transfer your music from your computer to your iPhone. Similarly, you can also create ringtones in iTunes and set them on the iPhone.
With an iMac or MacBook, all you need for putting ringtones on iPhone is your music library in iTunes and a Lightning cable that connects your iPhone and Mac.
Note, however: The instructions only work if your desired song is in your music library. If, on the other hand, you listen to music via services such as Spotify or Deezer, you, unfortunately, cannot use iTunes to transfer it to the iPhone.
Option 1: Add a Ringtone to iPhone with iTunes
- Open iTunes on your iMac or MacBook. Select the song you want from your database.
- Right-click the song you want, navigate to Info > Options, and choose a 30-second interval between start and stop. Confirm your entry with OK.
- Go to File > Convert > Create AAC Version. iTunes will now create an m4a file with the length you entered. This will then appear in your library under the original song.
- Select the copy with your left mouse button and drag the file onto your desktop.
Now you change the file format of your future ringtone. To do this, right-click on the file, choose Rename and change the file extension (after the dot) to m4r. Confirm your entry in the pop-up window with Use .m4r.
You have now created a ringtone file in the correct format for the iPhone. Then connect your iPhone to the iMac or MacBook using a Lightning cable to transfer the song to your iPhone:
- Open iTunes again and click on the small smartphone icon in the menu bar under the play options.
- In the overview of your smartphone, scroll down to options and check the box for Manually manage music and videos.
- Go to the Sounds tab and drag and drop your m4r file into the iTunes window. Click the Sync button and wait for your Mac to transfer the ringtone to your iPhone.
- Click Done to safely disconnect your iPhone from the Mac.
Finally, you can see the song you want under Ringtones on your iPhone under Settings > Sounds & Haptics > Ringtone. Tap it to select it.
Option 2: Create a ringtone without iTunes using Garageband
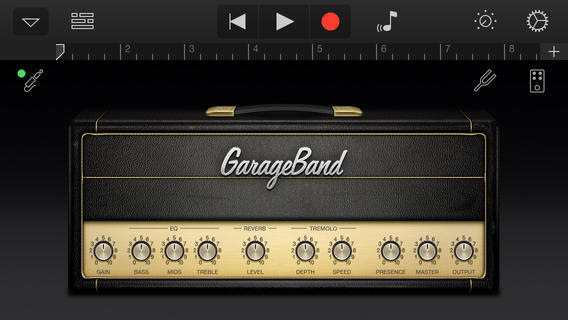
Instead of iTunes, you use another Apple app. Apple application GarageBand allows you to create ringtones directly without iTunes. The app is completely free, but it takes almost 2 gigabytes of your iPhone memory.

Here are the steps how to add a ringtone to iPhone without iTunes:
- Start GarageBand and select Audio Recorder under Tracks.
- Tap on the small plus symbol in the upper right corner and select the option Automatic.
- Deactivate the clock generator at the top next to the red record button.
- Use the looping button at the top right to select the song you want from your iPhone.
- Cut the song to a ringtone no longer than 30 seconds. To do this, move the slider to the desired position in the song.
- Tap the audio track and tap Share. If you drag the scissors symbol down, the soundtrack will be split. Then delete the unnecessary parts of the song.
- Tap the little arrow in the top right corner and select My Songs. Tap Select on the right and mark the ringtone.
- You can use the upload button to save the sound as a Ringtone. Give it a suitable name. Then you just have to set the ringtone as the new ringtone in the Settings app on your iPhone under Sounds & Haptics.
Option 3: Simply create a ringtone using the app without iTunes
You don’t want to go through the hassle of using your computer and change your iPhone ringtone without iTunes? Then this application from the App Store will help you to convert your mp3 files into the suitable m4r format.

WALTR 2 will transform any sound file in MP3 format into an M4R format without involving iTunes at all. All you have to do is, in the end, select the title as usual via Settings > Sounds & Haptics > Ringtone.
What’s more, WALTR 2 will create ringtones from YouTube tracks and virtually any music or video-sharing platform. You can also use it to move eBooks and all sorts of files to your iPhone without worrying about file compatibility.
Conclusion:
Although Apple does not offer its iPhone users a direct option to change ringtones for free, there are several options for you to personalize your incoming calls via iTunes, GarageBand, or WALTR 2. It’s time to give your iPhone your favorite song as a ringtone. This makes it fun to receive calls and messages, so you pick up the call in a good mood right from the start.
Don’t forget to bookmark and always visit every day Technadvice.com because here you can find the latest Technology information such as How-to Guide Tips and Tricks Blogging Digital Marketing Windows Android Root Social Media games, ETC. Best of luck.


![200+ Free Roblox Accounts With Full Robux That Works [2024] 200+ Free Roblox Accounts With Full Robux That Works](https://technadvice.com/wp-content/uploads/2023/07/200-Free-Roblox-Accounts-With-Full-Robux-That-Works-218x150.jpg)


