How to Install and Setup Kodi Properly – This Kodi installs and setup guide is for Kodi version 17 users. If you are using an older version, most of the menu options in Kodi 17 look very similar. So, you can also apply this guide to older versions of Kodi.
Table of Contents
How to Install and Setup Kodi Properly – Complete Guide
The best thing about Kodi is that some so many options and customizations can be done.
So that Kodi can be truly ours, starting with skin settings, backgrounds, and of course third-party add-ons/add-ons.
Read more:
- What is Kodi? Everything You Need to Know About Kodi
- Download and Install Kodi 17 Krypton on Windows 10 PC
- Best 3 Ways To Update Windows 10 Offline Permanently
However, that doesn’t mean you can easily install and configure everything, it can be said to be quite complicated, especially for those of you who are new to Kodi.
Complete Guide Kodi Installation & Settings
Kodi has a huge community of users, developers, and of course a great collection of Kodi Wikis.
This will be a tremendous resource once you start using it, even to the point of updating your own Kodi setup.
Currently, there are not many websites or blogs in Hindi that discuss Kodi.
Discussing the installation and settings, to discussing third-party add-ons that further enrich Kodi itself.
However, English-language websites or forums can be found, and for those of you who don’t understand English, installing and setting up Kodi can be a bit challenging.
While there are still many Kodi guide Wikis that provide a good overview, sometimes those Wiki guides don’t provide a clear enough way to do it.
Guide How to Setup Kodi
If you are new to what Kodi is and are just about to start from scratch, then you can read this Kodi installation and setup guide from start to finish to the complete installation.
Or, you can use the table of contents below to skip to the section you want and ignore the rest.
Kodi works on a lot of different hardware and has so many options and settings, that we think explaining them one by one, is almost impossible.
However, if you follow this guide, we believe you are on the right track, you can easily know and understand the basics according to Kodi itself.
So, whatever the device, and the OS, we believe you can install & set it up with ease.
One thing you should know is don’t be afraid to make mistakes when trying the Kodi installation and setup process.
Because you can always reset (reset) Kodi and start over again if you mess up the settings & settings.
Especially for setting up third-party Kodi Add-ons.
What is Kodi?
Kodi, formerly known as XBMC, is a thriving open-source entertainment media hub that started as an amateur project to play content on the original Xbox.
XBMC itself stands for Xbox Media Center.
Learn more about What is Kodi? you can see in the following link: What is Kodi? Everything You Need to Know About Kodi
Versions of Kodi, generally named after popular sci-fi movies, comic books, or other general certificates, include:
- XBMC v8.10 Atlantis (2008) – (Stargate)
- XBMC v9.04 Babylon (2009) – (Babylon 5)
- XBMC v9.11 Camelot (2009) – (King Arthur Mythos)
- XBMC v10.0 Dharma (2010) – (Lost)
- XBMC v11.0 Eden (2012) – (Garden of…)
- XBMC v12.0 Frodo (2013) – (Lord of the Rings)
- XBMC v13.0 Gotham (2014) – (Batman)
- Kodi v14.0 Helix (2014) – (Helix TV Show)
- Kodi v15.0 Isengard (2015) – (Tolkien)
- Kodi v16.0 Jarvis (2016) – (Tony Stark – AI)
- Kodi v17.0 Krypton (2017) – (Superman)
- Kodi v18.0 Leia Beta version (2018) – (Star Wars)
Latest Kodi Features – Kodi v17 Krypton
Most of the previous Kodi features were in Kodi v17 Krypton, the latest update was added and one of the main things we noticed right away was the new Basic Appearance/Theme (default skin).
Kodi v17 modern base theme comes with two new default skins (new themes), Estuary for most devices & Estouchy for mobile devices using touch screens.
This skin replaces the primary Kodi interface based on the familiar central screen ribbon with the generic left-hand menu interface for some other streaming services.
That was, a glimpse of what Kodi is, and some versions of Kodi that you should know, as well as modern features of Kodi v17 Krypton.
Meanwhile, for Kodi v18 Leia is still in the Beta term, namely the development & testing phase.
Now, it’s time for us to install & set up Kodi.
How to Download & Install Kodi
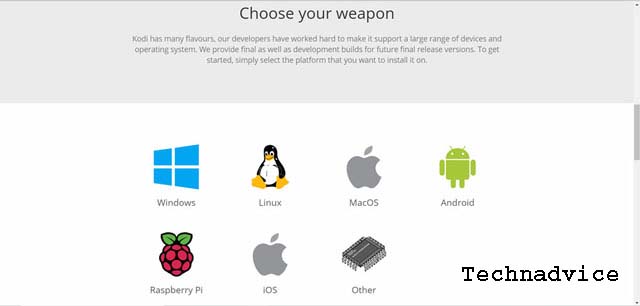
As we said earlier, Kodi runs on a lot of hardware and on all the OSs that are popular today.
So, before you download & install Kodi, you must first make sure the device and OS you are using to install Kodi.
Kodi download & installation depends on what device and OS you are using, as there are several different options on how to install Kodi.
You will find the latest version on the official Kodi page https://kodi.tv/download/.
Whereas for Android users you can install Kodi directly from the Google Play Store.
Once you find the correct implementation of the latest version of Kodi, go through the download and installation process as usual.
Next is how to set up Kodi, so that it can be used easily as an entertainment medium for your home.
How to Use Kodi
We assume that this is your first time setting up and installing Kodi, we will give you a brief way of navigating the Kodi interface (view).
Older versions of Kodi had primary controls placed on a ‘ribbon’ along the center of the screen and were configurable to an exclusive extent.
Kodi 17 introduces a new skin (theme) that aligns everything along the left side of the screen to suit Netflix and Plex.
This main menu by default includes categories such as:
- videos,
- Film,
- TV shows,
- Music,
- Music Videos,
- TV,
- Radio,
- Picture,
- Add-ons, and
- Weather.
Depending on the theme, you can sometimes add additional categories or hide the ones you don’t use.
Context menu
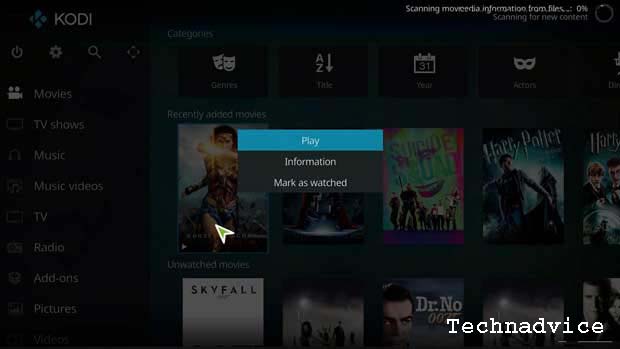
The Context Menu will provide additional functionality depending on which screen you are on when you click on it.
As a model, in the image above, I open the contextual menu for the movie – Wonder Woman.
Here, the context menu gives us the option to play the video, mark it as watched, or view additional coverage of the film.
On other screens, the options you see may differ depending on the type of media itself.
To view the Context menu, depending on the type of device you are using, i.e. Kodi made:
- Android: Press / Click the Menu and Hold for a while
- Mouse: right-click
- Keyboard: ‘C’
- Amazon Fire TV: Menu button
- NVIDIA Shield Controller: ‘X’ Button
Kodi Setup for Offline (non-streaming) Media Files
In this post, we will show you how to set up Kodi for offline media files.
So, media files such as music, movies, or TV series, are files that have been downloaded or rip by DVD or Blu-ray.
Which is then copied into the storage space that will be used by Kodi later.
Kodi Setup Guide: Video Library
One of the most important steps in setting up Kodi is creating your media library.
Let’s start with adding videos to your Kodi library.
If you haven’t copied (rip) your DVD or Blu-ray movie collection to your hard disk, you’ll need to do that first.
Or if you have a collection of videos or movies that you downloaded earlier, just add them to your external hard disk or flash or memory card that is connected to your device with Kodi installed.
Before you start adding any archives on your hard drive (HDD, flash, memory card), there are a few things you must do first.
Kodi runs media archives using proprietary formats, and each format differs between movie or TV show files.
If the file name is not registered correctly, then Kodi may not be able to run it.
Kodi uses a process called scrap to pull data from the archive.
If Kodi can’t read the file properly then it can do error one based on these two things:
- Kodi may ignore files and skip them while creating a movie/video library for you, or
- Worse still, Kodi thinks it’s the wrong movie/video file.
How to Set Up a Kodi Media Library
There are two common ways to organize Kodi media folders:
- Folder containing all media files
- Every movie, Music, and TV Series is in its folder
It all depends on how you want to set it up.
But we recommend that you manage your media files in separate category folders.
This makes it easier if your media files are large, and will likely continue to grow larger over time.
How to Add Movies to the Kodi Library
Kodi uses generally the same process to add Movies, Music, or Images to your Kodi media library.
Of course, there are differences, but the three processes will all start in the same way.
If you skip this section & plan to ignore the Add Music or Add Images sections, then you will see the same poly captions repeated.
However, it is a good idea to read each topic, because there will be some specific information for each section that will not be included in the other 2 sections.
Start by scrolling down to Movies on the menu.
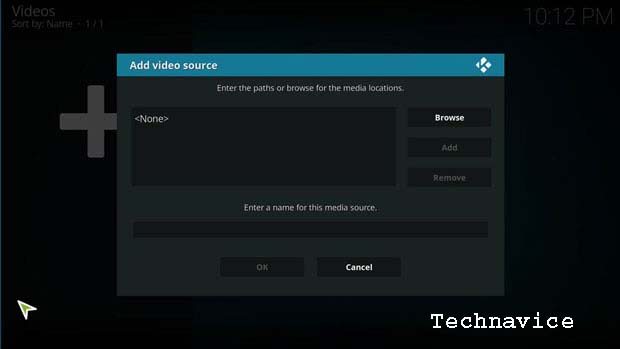
Once you are there, click on the button that says Enter Files Section.
If you don’t have anything in your Kodi library, it will take you directly to the screen below.
You can directly type the path or address of the drive and folder where you store your media locally (HDD, Flashdisk, Memory Card).
Or you can click the browse button and browse & navigate yourself to the drive & folder where the media files are stored.
You can even add media files that have been shared within your local network.
In this case, we will put a model of how to retrieve the media archive from the local network.
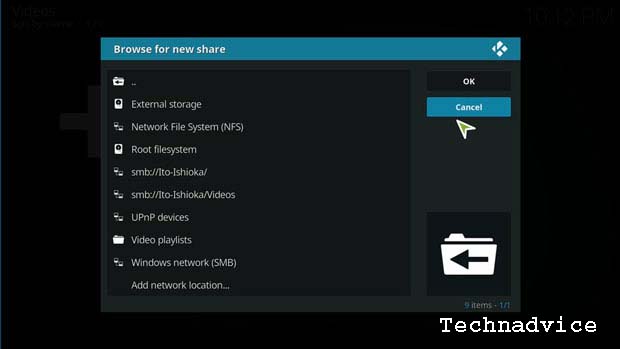
You’ll see the multiple media archives listed in the screenshot above, along with multiple subfolders.
If your storage device is not on the list, you can click “Add Network Location” at the bottom of the list.
Or if you save it on an external storage device, you can specify the “External Storage” menu, and if it’s in the internal storage you can specify “root filesystem”.
Then you can browse or search for the drives and folders where your media files are stored.
Kodi Setup for Online (Streaming) Media Files
When running entertainment media files such as videos, music, and images offline, this means that Kodi acts as an Offline Media Player, like other video, and music player applications.
The advantage of Kodi compared to other media players is that it can run media files stored on other online storage media such as Open Cloud, Google Drive, and other media storage servers.
That is, we can run or play videos, music, and pictures online or in other terms do exclusive streaming based on online storage servers.
Just like when we stream movies directly from lk21.
What sets it apart is that you won’t get a lot of pop-up screens that occur in the browser when we try to stream directly from an internet browser like Google Chrome or Mozilla.
This means that you won’t find a lot of ads on Kodi when you’re streaming privately.
Because Kodi fetches media archives exclusively according to the server where the media files were stored.
To do this, you are required to install a Kodi Add-on or add-on. Especially Add-ons or add-ons according to third parties.
In addition, you are also required to make special settings so that then you can just stream & enjoy home entertainment easily, without having to download.
How to Install and Setup Kodi Add-ons
Add-ons are the heart of Kodi.
Many people will argue that without third-party developers creating add-ons and adding additional functionality, Kodi would never be as popular as it is today.
Kodi includes the Official Kodi Repository filled with hundreds of add-ons provided and supported by either the members of the Kodi Team or the developers they trust.
You can find add-ons for anything you want, for example:
- Theme,
- streaming,
- Sport,
- Live TV, and much more.
There are many unofficial repositories on the Internet that you can download add-ons from.
How to Install & Setting the Official Kodi Add-on
In this section, we will show you how to install the Kodi Add-on officially.
Namely:
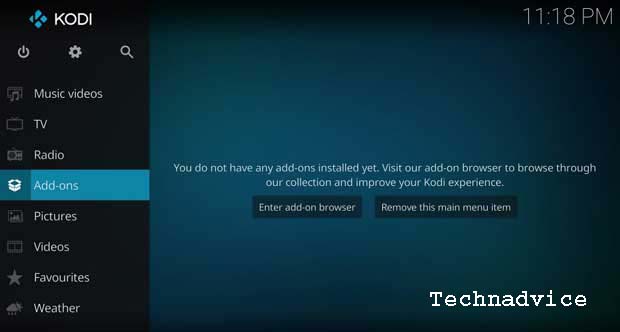
The easiest way to install Kodi add-ons is to scroll down to the Add-ons menu and then Enter Add-on Browser.
Browser Add-ons/ Kodi Add-ons
Once you open the Add-on browser, you will find several different options.
My Add-Ons: This will bring up a list of all add-ons, grouped by category, and whether they are enabled or disabled on this Kodi installation.
Install from Repository: These are all the add-ons available for installation in the official Kodi repository.
Install from Zip File: This is how to install Add-ons that are not in the official Add-ons list. In other words, this is how you install unofficial Add-ons and explore them. To do this, it gets a little more complicated, and we’ll cover that below (keep reading this article).
Search: If you know what add-on you are looking for, or just have an overview of the topic, you can enter it here and see the results.
Recently Updated: This will show the add-ons that have been updated.
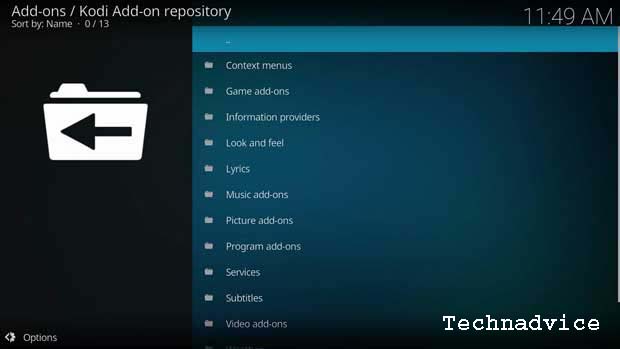
For our purposes, we will be installing error one of the official video add-ons, so click Install from Repository.
Add-ons are broken down into asynchronous categories such as the Context menu, Program Add-ons, & Look and Feel Add-ons.
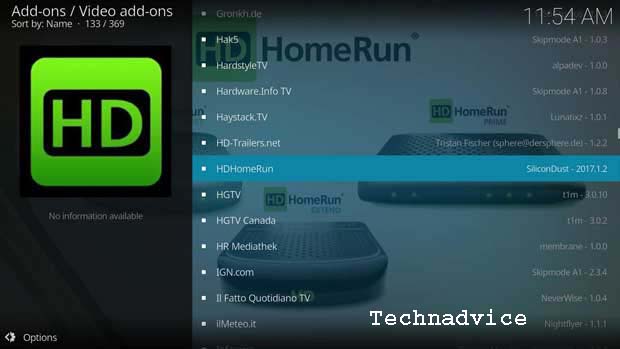
As a model, we will install the official Kodi Video Add-on.
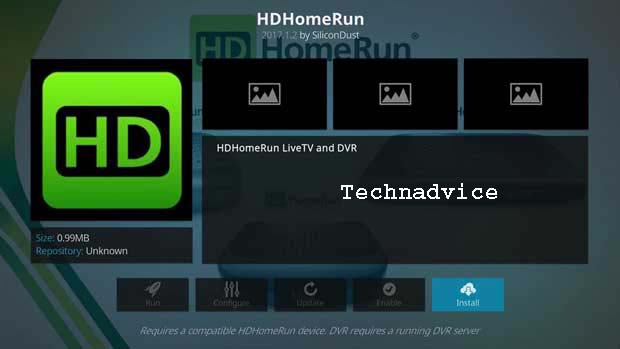
In this model, we will install the HomeRun HD tuner addon.
Once you’ve selected the addon you want to install, you’ll be taken to a screen with a brief description and some additional options.
Since we haven’t installed the add-on, most of these options are not available to us.
Click Install to continue.
Once you have decided to install the add-on, you will be taken back to the Add-on Browser and the installation will begin.
You will receive a notification when the add-on installation is complete.
Once that happens, click return to addon and all clicked options on the drawing page will now be available.
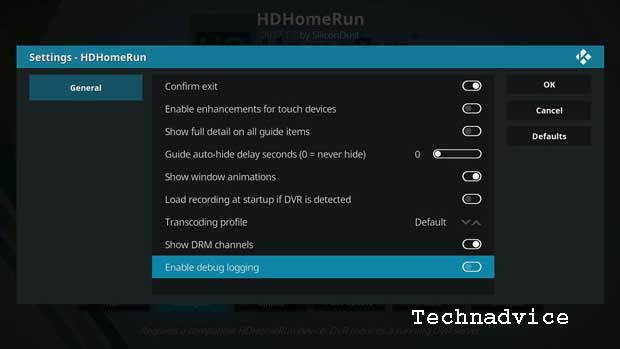
The one you probably use the most is the Configure button.
This is where you’ll find whatever options the addon programmer has enabled.
Many add-ons have nothing on this screen, so don’t be surprised if it’s empty.
Kodi now gives you the option to configure each add-on to automatically update itself, or never update.
Generally, I set add-ons to update Kodi automatically because I want to make sure that I have a modern version with new features or bug fixes.
But, sometimes, updating an add-on will cause it to crash, so this allows you to find a working version & keep it indefinitely.
How to Install and Set Up Unofficial Kodi Add-ons
The advantage that Kodi has is that many independent Kodi add-on developers leave the freedom for us to use them.
But this is still a controversy because most people think that this is illegal.
Just as you stream directly from streaming sites such as LK21, that is also actually illegal, so don’t be surprised if today these sites can still be opened, but tomorrow they will be blocked & as “positive internet”.
So, we provide this method to you for general knowledge only, if you intend to continue and use it, at your own risk.
We are not responsible if something happens to privacy or lawsuits regarding intellectual property.
Before we install and set up unofficial Kodi add-ons, it’s a good idea to know first, trusted (unofficial) third-party add-ons.
Even if you use an unofficial Kodi add-on from a third party, you must make sure that the add-on is bona fide.
For that, here we provide a list of the 10 best and most trusted third-party add-ons in 2024:
- Covenant
- Exodus (Version 8)
- The Magic Dragon
- Nemesis
- Incursion
- Exodus Redux
- Yoda
- Maverick TV
- Gen-X
- Movie Theater Butter
From the list of 10 add-ons above, in this article, we only provide 1 example of installing and setting up the Kodi add-on.
And as a model, we will install the Kodi Exodus Add-on.
This guide will show you how to install Exodus Kodi Addon on Kodi 18.0 Leia and Kodi 17.6 Krypton.
The steps given in this tutorial work for Kodi on PC, Amazon Fire TV Stick/ FireStick 4K, Nvidia Shield, Android, and other Android TV Boxes.
Exodus is one of the best third-party Kodi Addons for users who love to watch movies, TV Shows, Anime, Documentaries, and Sports.
How to Install and Setup the Kodi Exodus Add-on
You need to know, if this is your first time installing a third-party Kodi Addon, I’m sure the “Unknown Sources” option is still disabled in your Kodi program.
Therefore you need to enable it to be able to download and install the Kodi Add-on that arrives from an unofficial Kodi developer.
The method:
Kodi Leia 18.0: Settings > System > Add-ons > Unknown Sources
Kodi Krypton 17.6: Settings > System settings > Add-ons > Unknown Sources
Next, follow these steps to install the Exodus Add-on on Kodi.
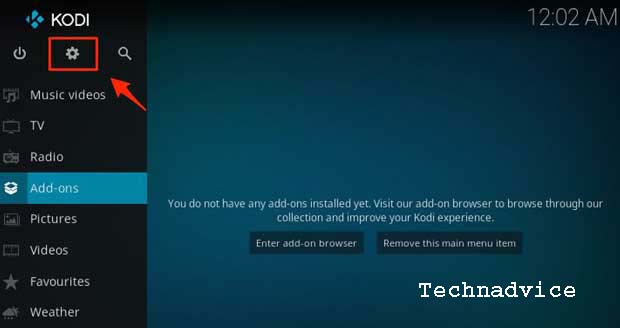
Step 1: Run your Kodi App, according to the device and OS you are using.
Step 2: Click the Gear (Settings on the left of the screen)
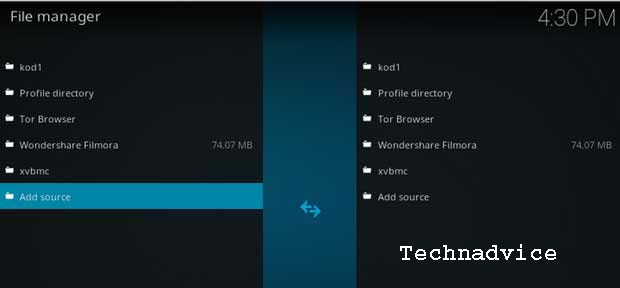
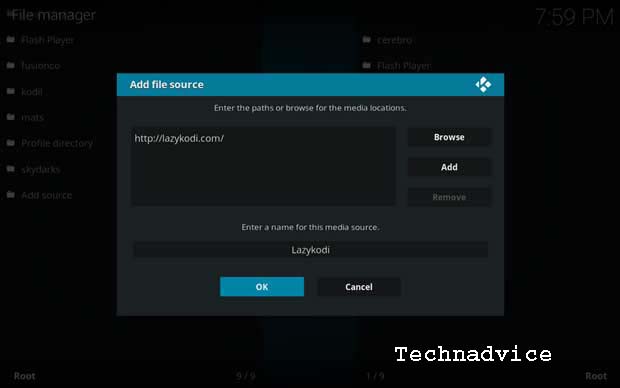
Step 3: Open “File Manager” then click “Add Source”
Step 4: Replace “None” with this URL – http://lazykodi.com/ then name it “Lazykodi” in the name field. Then click OK.
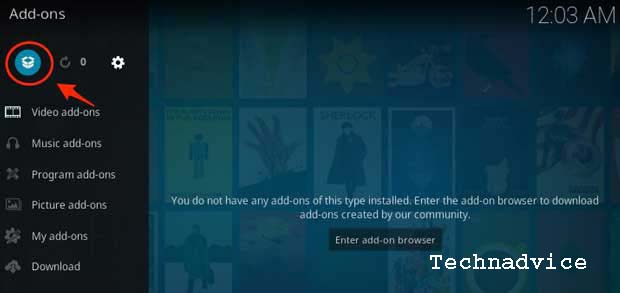
Step 5: Go back to the Kodi home screen. Click “Add-ons” on the left side of the screen, and then open “Package Installer” at the top left of your Kodi screen.
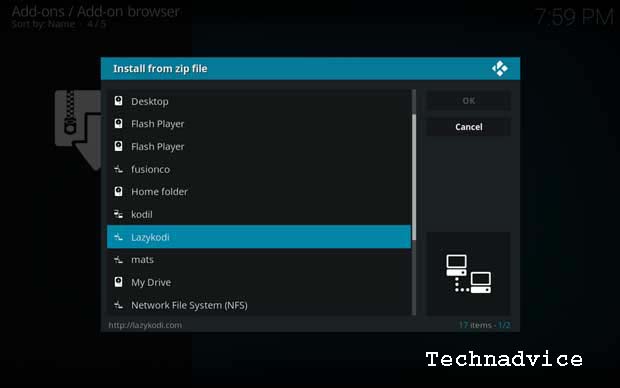
Step 6: Open “Install from Zip File” and Click on “Lazykodi”
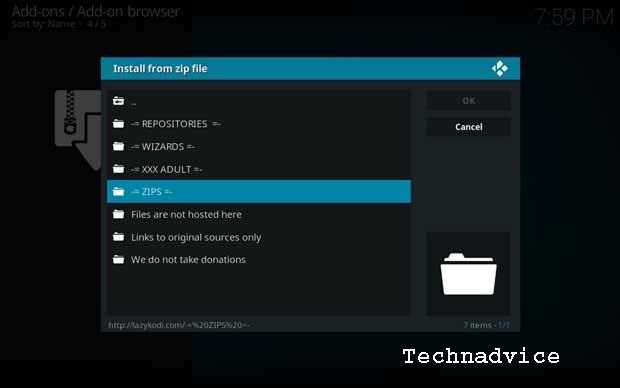
Step 7: Click “ZIPS” to install the “KodiBae repository” for Exodus.
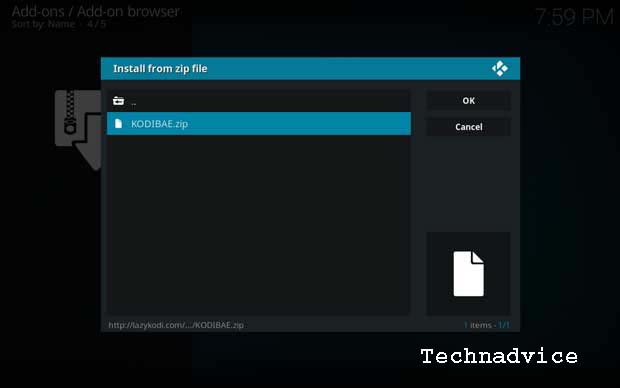
Step 8: Click “KODIBAE.Zip
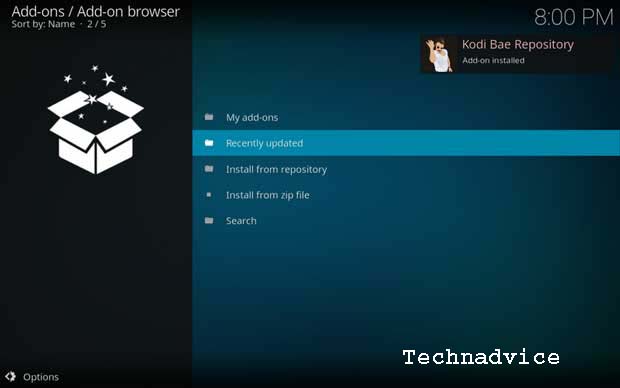
Step 9: Wait for the successful notification to appear on the top right of the screen. After the “Kodi Bae Repository Add-on is installed” notification, you are ready to proceed with the next step.
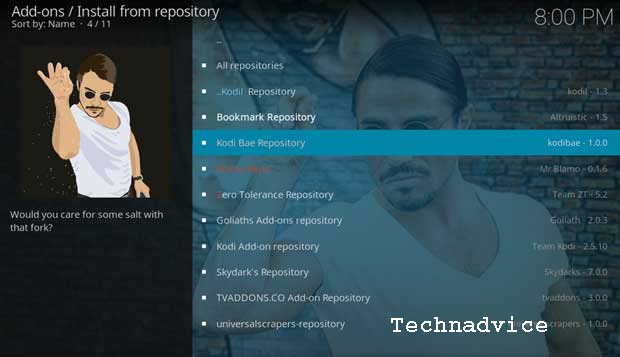
Step 10: Click “Install from Repository” and select “Kodi Bae Repository”
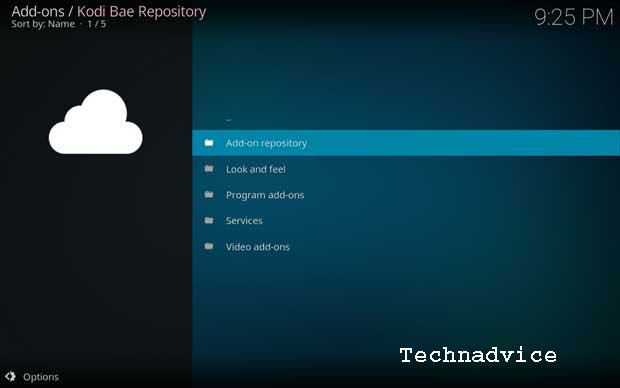
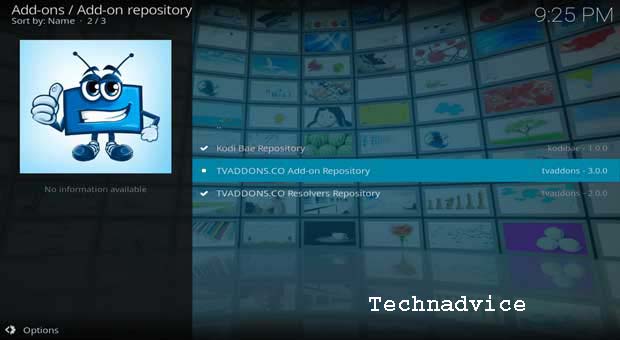
Step 11: Open “Add-on repository”
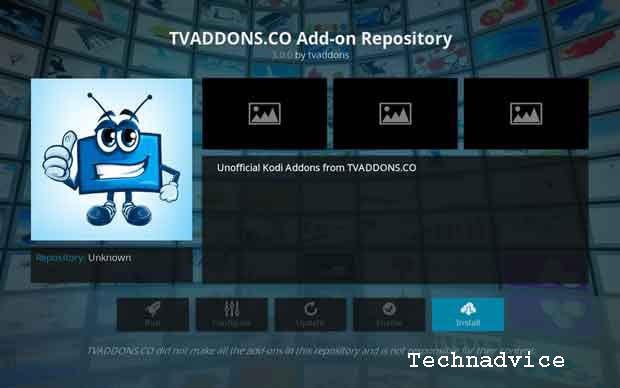
Step 12: Click “TV ADDONS.CO Add-on repository”
Step 13: Click “Install”
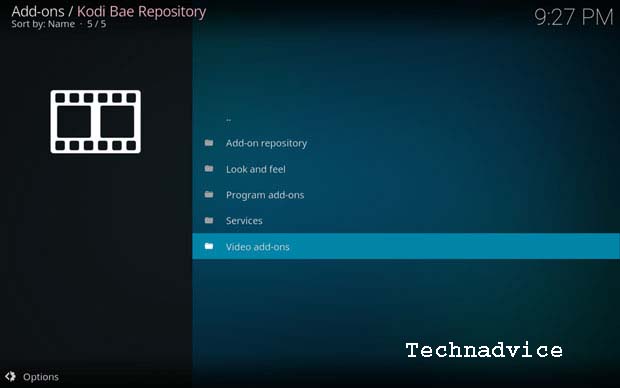
Step 14: Now go back to the Kodi Bae Repository and Open the “Video Add-ons” folder.
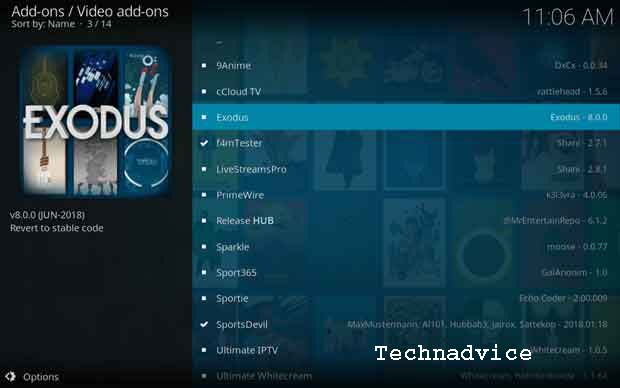
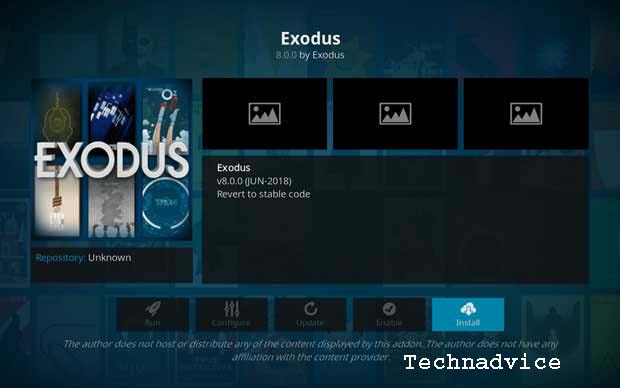
Step 15: You will see a list of Kodi Add-ons on your screen. Find and open “Exodus.”
Step 16: Now click “Install” to complete the installation process.
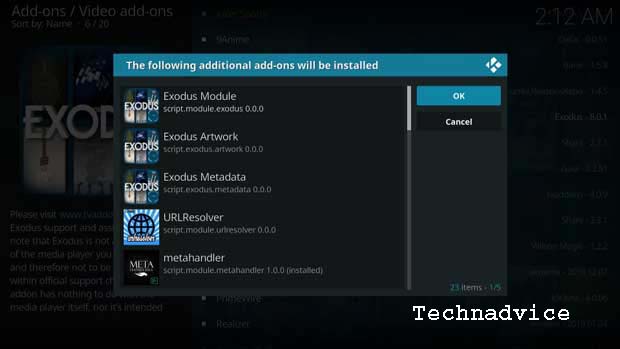
Note: If you installed Exodus in Kodi 18.0, you will see the following prompt after clicking Install above. This prompt lists all additional addons that will be installed using the Exodus addon. Click ‘OK to continue
Step 17: Wait for Exodus Kodi Addon to download and install from the Kodi Bae Repository. Once you get the success notification on the top right of your screen, you are done with the installation process.
Conclusion:
This is the explanation of how to install and set up Kodi properly. Furthermore, we will continue to update, legitimate third-party add-ons, to enrich your Kodi usage.
Leave a Reply