8 Steps To Install and Use Apple Notes on Windows 10 PC – Apple Notes is a useful application for taking notes on Apple devices. This application is linked to an Apple ID account so that it can be used on all connected Apple devices be it a Macbook, iMac, iPhone, or iPad.

How to install and use Apple Notes on Windows 10 Laptop PC
You create notes in Apple Notes are stored in Apple’s iCloud, so they sync across all your devices. This will make it easier for you to quickly take important notes on whichever device is currently being held, and to continue them on other connected devices.
Read more:
- How to Install Windows 10 on MacBook and iMac
- Best Tips for Taking Care of Your MacBook Battery
- How To Hide IP Addresses on Windows and Mac
- Review Recoverit – Software For Restore lost data on Mac
What about users who use Apple devices but also use Windows, such as Dual Boot macOS and Windows 10 for example. Can you install the Apple Notes application on Windows 10?
Until now, there is no Apple Notes application for the Windows 10 desktop, so it can only be accessed via a browser. However, there is one trick we can do to access Apple Notes as if it were an application.
#1. Open Google Chrome
First, as usual, to access the Apple Notes application on Windows 10 we need a browser. It is recommended to use the Google Chrome browser.
#2. Create a new profile on Google Chrome
The next step is to create a new profile on Google Chrome. The goal is to separate the Apple Notes cache and cookies from the commonly used browser.
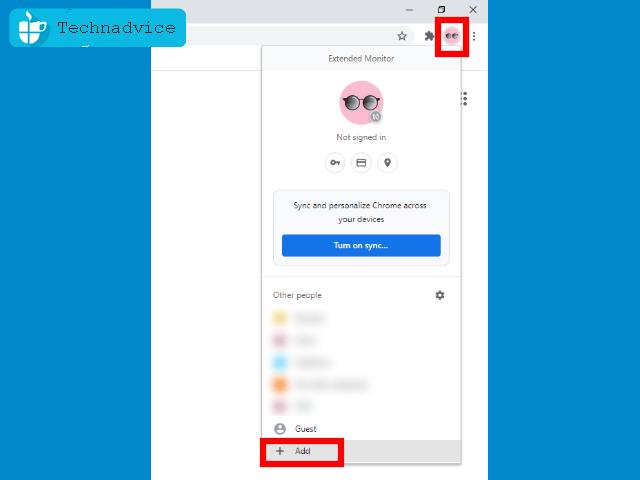
In Google Chrome, click the Profile button > click the Add button.
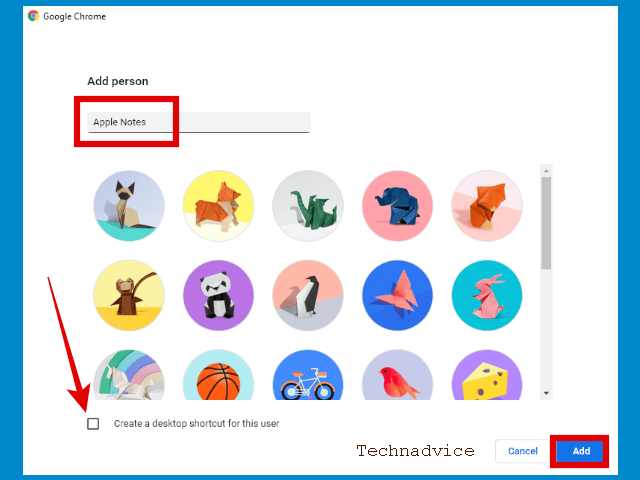
Name the new Chrome profile Apple Notes, or whatever you like. Uncheck Create a desktop shortcut for this user > then click the Add button.
#3. Open the Apple Notes application
Make sure you are on the new browser profile that was created earlier.
Then enter the Apple Notes application via the following link:
#4. Login with Apple ID
You will be asked to log in with an Apple account.
Login as usual, if you have activated 2-step verification then you need to open your Apple device to get the code.
Important step: You have to check the option Keep me signed in.
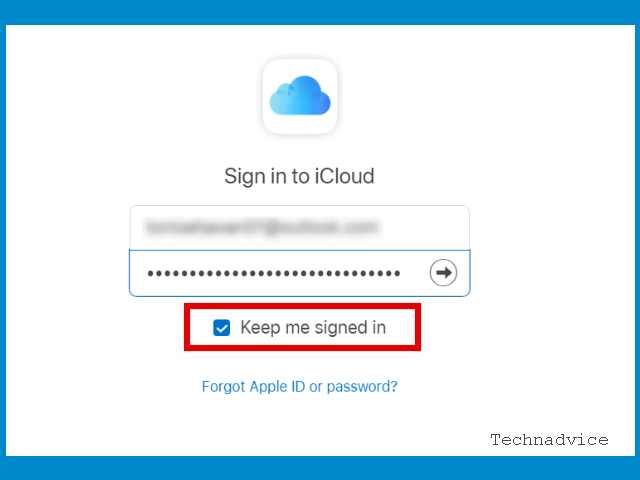
The Keep Me signed in option must be checked, the goal is that the Apple Notes application on Windows 10 can be opened immediately without logging in repeatedly.
#5. Select Trust this browser
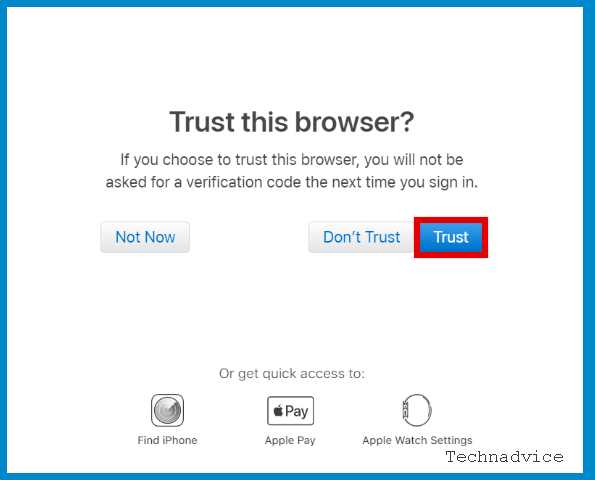
Then the question Trust this browser will appear. Click on the Trust option. The goal is that the next login does not need to use a verification code again.
#6. Create an Apple Notes application shortcut in Windows 10
After entering Apple Notes in the browser, the next step is to create a shortcut on the Windows 10 desktop.
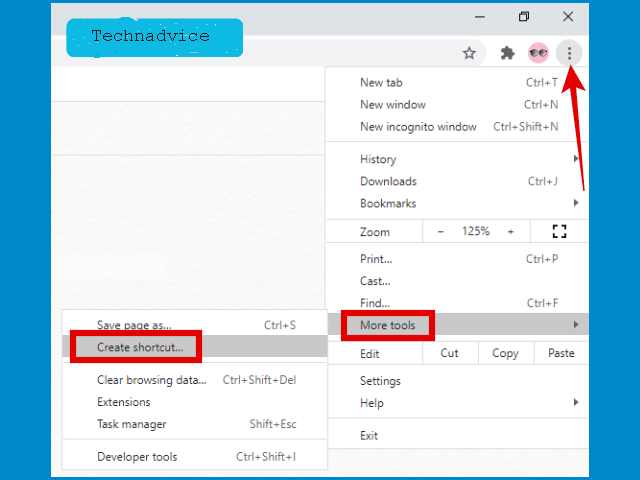
The trick is to click on the menu button in the upper right corner> select More tools > click Create a shortcut
#7. Give the shortcut a name as you wish
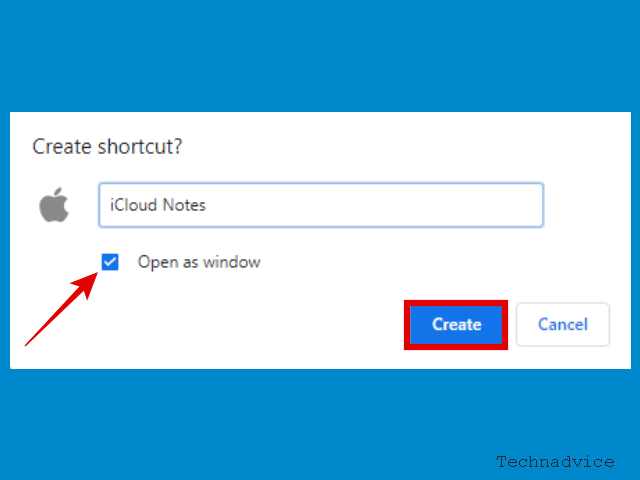
A pop-up window will appear, then you can name the Apple Notes application shortcut as you wish. Check the Open as window option > click Create.
#8. Use the Apple Notes application via the shortcut that has been created
Return to the Windows 10 desktop. There you will find the Apple Notes application shortcut according to the name you gave earlier.
This shortcut will be used to open Apple Notes every time you want to use it.
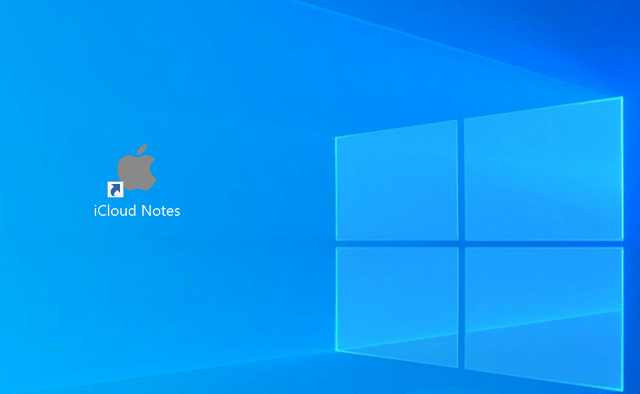
By accessing this shortcut, you will go directly to Apple Notes without having to log in, provided you do not clear the cache and cookies on your browser.
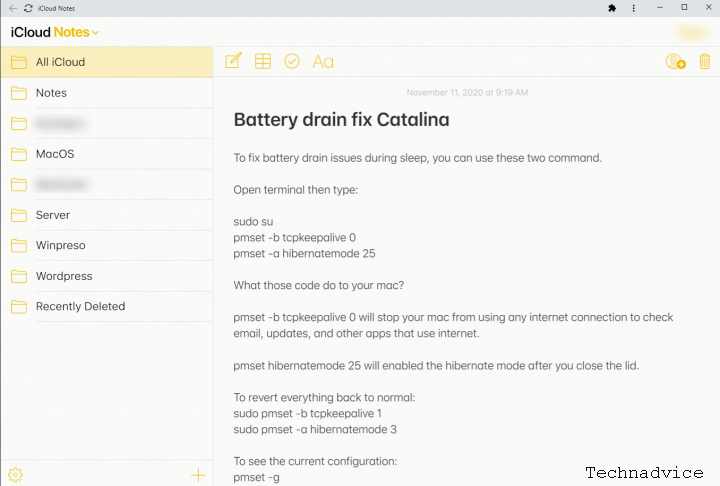
The Apple Notes app on Windows 10 looks like this:
Solution for dual boot Windows 10 and macOS
Those of you who use Windows 10 and macOS dual boot on one Apple computer (Macbook or iMac) and don’t have any other Apple devices will experience difficulty logging in.
When logging into Apple Notes on Windows 10, you will be asked for a verification code sent to the Apple device, which is the computer currently being used.
The problem is, that we can’t run macOS and Windows at the same time.
Then what is the solution?
So easy. All you need to do is sign out of your Apple ID account on your Macbook or iMac before doing the tricks in this tutorial.
You do this by going to System Preferences> Apple ID > Overview > Sign Out.
After that reboot into Windows 10 and start doing the trick to create a shortcut to the Apple Notes application in this tutorial. When logging in, a verification code will be sent to the cellphone number.
Read more:
- How To Take Screenshots on a Mac Computer
- macOS Understanding and History, Advantages and Disadvantages
- 17 Cool and Light Windows 10 Theme
Conclusion:
When finished, you can re-login on your Macbook or iMac as usual. Don’t forget to bookmark and always visit every day Technadvice because here you can find the latest technology information such as How-to Guide Tips and Tricks Blogging Digital Marketing Windows Android Root Social Media games, ETC. Best of luck.
Leave a Reply